Starting your sprinkler system guide

Cowboy Lawn and Sprinkler: Spring Sprinkler System Start-Up Guide

Preparation Steps:

  1. Check the Weather Forecast:
    • Ensure no risk of frost in the upcoming days. We recommend starting your system in April or May, but be prepared to occasionally turn off your water or drain it overnight during this period.
  2. Inspect Your Sprinkler System:
    • Conduct a visual inspection of all sprinkler heads, valves, and pipes for damage or obstructions.
    • Clear away debris or dirt that could block the sprinkler heads.
  3. Gather Necessary Tools:
    • Keep a flathead screwdriver and pliers ready for any minor adjustments.

Closing the Backflow Prevention Device:

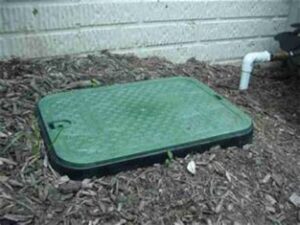
  1. Locate the Backflow Prevention Device (PVB):
    • Find the brass and copper assembly, usually shaped like a bell, with pipes leading to and from it. Valves should be in the winter position, at a 45-degree angle.
  2. Close the Test Cock and Isolation Valves:
    • Locate the two isolation valves on the device. Turn each clockwise no more than ¼ turn to close. A closed valve handle is perpendicular to the pipe.
    • Use a screwdriver to close the test cock valves near each isolation valve. Turn the screw top to align the line or groove perpendicular to the valve opening.

Turning On the Water Supply:

  1. Locate the Main Sprinkler Water Valve:
    • Find the main valve, often in a basement, utility closet, near your water meter, or where the main water line enters your house.
  2. Slowly Open the Main Valve:
    • Ensure the drain next to the main valve is closed and not leaking.
    • Gradually open the main valve to prevent a surge of water pressure.
  3. Check for Leaks:
    • Inspect for leaks as water flows into the system.
    • Listen for water flow stopping at the backflow prevention device. If it continues after a minute, turn off the valve and check for open drains or breaks.
  4. Open Backflow Prevention Device and Charge System:
    • Open the isolation valve closest to the main sprinkler valve. Water splashing from the PVB is normal but should stop quickly. Ensure test cock valves are fully closed if there’s spraying.
    • Open the second isolation valve. Water may initially come out of the PVB until pressure stabilizes. Continuous leakage indicates an open drain, zone, or valve.

System Inspection:

  1. Activate Each Zone Separately:
    • Turn on each zone manually or via the control panel.
    • Ensure each sprinkler head operates correctly, popping up and distributing water evenly.
  2. Adjust Sprinkler Heads:
    • If necessary, adjust the heads for proper direction and range using a screwdriver and pliers.
  3. Inspect Control Panel Settings:
    • Verify the control panel’s date and time settings. Adjust the watering schedule for spring conditions.

Finishing Up:

  1. Check for Overwatering Signs:
    • Look for pooling water or runoff after running each zone, indicating overwatering.
  2. Final Walkthrough:
    • Conduct a final check to ensure all zones work correctly without leaks.

Reminder:

  • Regular maintenance is key for efficient system operation. Periodically check for leaks, broken heads, or irregularities.

Follow these steps for a smooth sprinkler system start-up this spring. Contact Cowboy Lawn and Sprinkler for any issues or professional assistance.

.

Steps to follow for our “Express” Blowout Only Service

  1. Locate and Shut Off the Water Supply PRIOR to our arrival
    All underground sprinkler systems have a main shut off point. For safety, it is often located in a basement, crawlspace, or in a utility closet. Some turn off valves are located in the ground close to the water meter and a long keyed rod is needed to turn the valve.
Image

Your sprinkler water supply valve will either be a “gate valve” or a quarter turn “ball valve”.
The gate valve will need to be turned clockwise to close.
The quarter turn ball valve handle will need to be perpendicular to the pipe to turn off the water.

Locate and Uncover In Ground Valve Boxes
These valve boxes are typically green and either rectangle or circular in shape. They may be under landscape rocks, mulch or other debris. Please remove rocks, mulch or debris that is covering them so we can identify them and blowout each zone. If you have a valve box located under a shrub or hidden from view please email us a description on the location and place a yard flag next to the area it is located. If we do not see the valve box we will not blowout the zones located in that box.

ImageImage

2. We will blowout your exterior lines and leave your backflow prevention device partially open
Image
Notice the blue valve handles are at 45 degree angles. This is to allow air into your lines to create a vacuum to drain the standing water in any interior lines. LEAVE THESE AT 45 DEGREE ANGLES ALL WINTER.


***YOUR SYSTEM IS NOT WINTERIZED UNTIL YOU DRAIN YOUR INSIDE LINES

3. Draining your inside lines

Typically your drain is located on or next to your sprinkler water supply shut off valve. It will either look like a outside water faucet or a small brass nipple that has a grooved cap covering it.

Image

Remove the cap and catch the water with a cup or bucket.
* The water should NOT have a lot of pressure when it comes out. If it has continues high pressure for more than 10 seconds make sure the sprinkler water supply is off and that you have the correct drain.
The amount of water drained depends on the length of pipe you have.


Drain Your System to Protect Against Freeze Damage

1. Turn off sprinkler water supply
2. Turn isolation and test cock valves to 45 degree angles on your backflow prevention device
3. Open the drain located in the in ground valve box(s). Close the drain after the water is drained
4. Open the drain located next to the sprinkler water supply valve
5. Cover the exposed copper and plastic piping on the side of your house with a towel, blanket or insulation, then cover that with a plastic trash bag

Preparing Your Lawn for Winter

Fall Lawn Prep for Littleton & Highlands Ranch:
How to Get Ready for Aeration, Seeding & Winterizing

Fall is the most important season for cool-season grasses like Kentucky Bluegrass and tall fescue—especially here in Littleton and Highlands Ranch, where summer stress can take a toll on turf health. A well-timed fall lawn care plan sets your yard up for success next spring, but preparation is key.

Whether you’ve scheduled lawn aeration, fall fertilizer, overseeding, or sprinkler blowout services, here’s how to get your lawn ready—and what to expect as temperatures begin to cool.

1. Keep Your Lawn Clear of Debris

Throughout the fall and into early winter, regularly remove leaves, sticks, pine needles, and branches from your lawn. A clean lawn helps:

  • Air and sunlight reach the soil

  • Prevent mold and fungal issues

  • Ensure seeding and fertilizer contact the soil surface

Blow or rake as needed—even after our service—to maintain your results.

2. Start Mowing to the Correct Height

As we move through fall, begin mowing your grass to a consistent height of 3 inches or less:

  • This helps prepare the lawn for aeration and seeding.

  • Mowing short before winter prevents snow mold and matted grass.

  • Limit mowing when the grass begins to brown or go dormant to reduce stress.

3. Adjust Your Watering Schedule

Once fall temperatures cool:

  • Cut back on watering frequency, but don’t stop entirely.

  • Watering 1–2 times per week may be enough to support new seed or help roots absorb nutrients from fall fertilizer.

Be sure to keep newly seeded areas evenly moist for the first few weeks after service.

4. Know the Best Time to Seed

Timing matters when it comes to overseeding your lawn:

  • Best time to seed is late August through September

  • October is too late for Kentucky Bluegrass (it takes 21–28 days to germinate)

  • If you’re seeding in October, we’ll use tall fescue, which germinates faster and better tolerates cool soil temps

Not sure what seed type is right for your lawn? We’ll help assess and plan your service based on your lawn’s condition and schedule.

5. Aeration & Fertilizing: Timing and Cut-Offs

The ideal window for fall lawn aeration and fertilizer treatments in Littleton and Highlands Ranch is:

  • September through the first week of October

  • After the first week of October, we shift our focus to sprinkler blowouts only

So, if you want to schedule aeration or overseeding, don’t wait—early fall is prime time.

❄️6. Prepare for Snow and Winter Lawn Care

Colorado winters can be dry, cold, and unpredictable. Here’s how to protect your lawn through the snow season:

  • Remove snow from shady areas where it lingers for weeks—this helps prevent:

    • Snow mold from forming

    • Voles from tunneling under snow and damaging your turf

  • Push snow toward sunny parts of your lawn where it melts faster

  • Limit foot traffic on frozen or brown lawns to avoid damaging dormant grass

  • Continue clearing leaves and branches through the winter to maintain airflow and reduce rot

Local Lawn Experts Serving Littleton & Highlands Ranch

At Cowboy Lawn and Sprinkler, we specialize in fall lawn services tailored to Colorado’s unique conditions. Whether you need lawn aeration, fertilizing, overseeding, or sprinkler blowouts, we’ve got you covered—with premium care and real results.

✔️ Serving Littleton, Highlands Ranch, and surrounding areas
✔️ Locally owned and operated
✔️ Experts in
cool-season lawn care, timing, and treatments

Reminder:
Aeration and fertilizing end after the first week of October. After that, we’re focused on sprinkler winterization only. Book now to reserve your spot before we switch gears!

Target Keywords:

Lawn care Littleton, lawn care Highlands Ranch, lawn aeration Littleton, fall lawn services Highlands Ranch, overseeding Littleton, sprinkler blowouts Highlands Ranch